View IMVU in App Store / Google Play Store
Project Overview
By introducing 3D environments, new users can experience 3D environments in a solo, asynchronous way that doesn't require the relative 'commitment' of joining a public chat room, or having any friends yet. This project is intended to drive engagement of new users, as well as highlight one of the biggest differentiators, with the goal of increasing early retention (first week).
Problem
2D Photo Booth is a popular feature, but only leverages a bit of the secret sauce that IMVU offers. Users have to go to a chat room to experience the 3D environments. We want user to try IMVU’s core features within 3 minutes, which includes dressing up avatars, controling the camera and taking photos.
Findings from User Research:User explained that he wouldn't buy clothes for the chatting portion, he explained that if he could have figured out photos (why they were there and how to make them) he might be more inclined to visit the store more and try to get more credits.
Approach
- Quickly address user complaints about their inability to post their own photos (via camera roll or real-time camera access in the app)
- Gain some momentum towards making it easier for customers to share their photos outside of IMVU via other social networks
- Improve the 3D camera controls
Process
Planning
Photo Booth Layout: Drawer vertical vs. horizontaPlanning
Room selections: 10-15 for launch (minimum 3 small, 3 medium, 3 large); Find room shells & place nodes
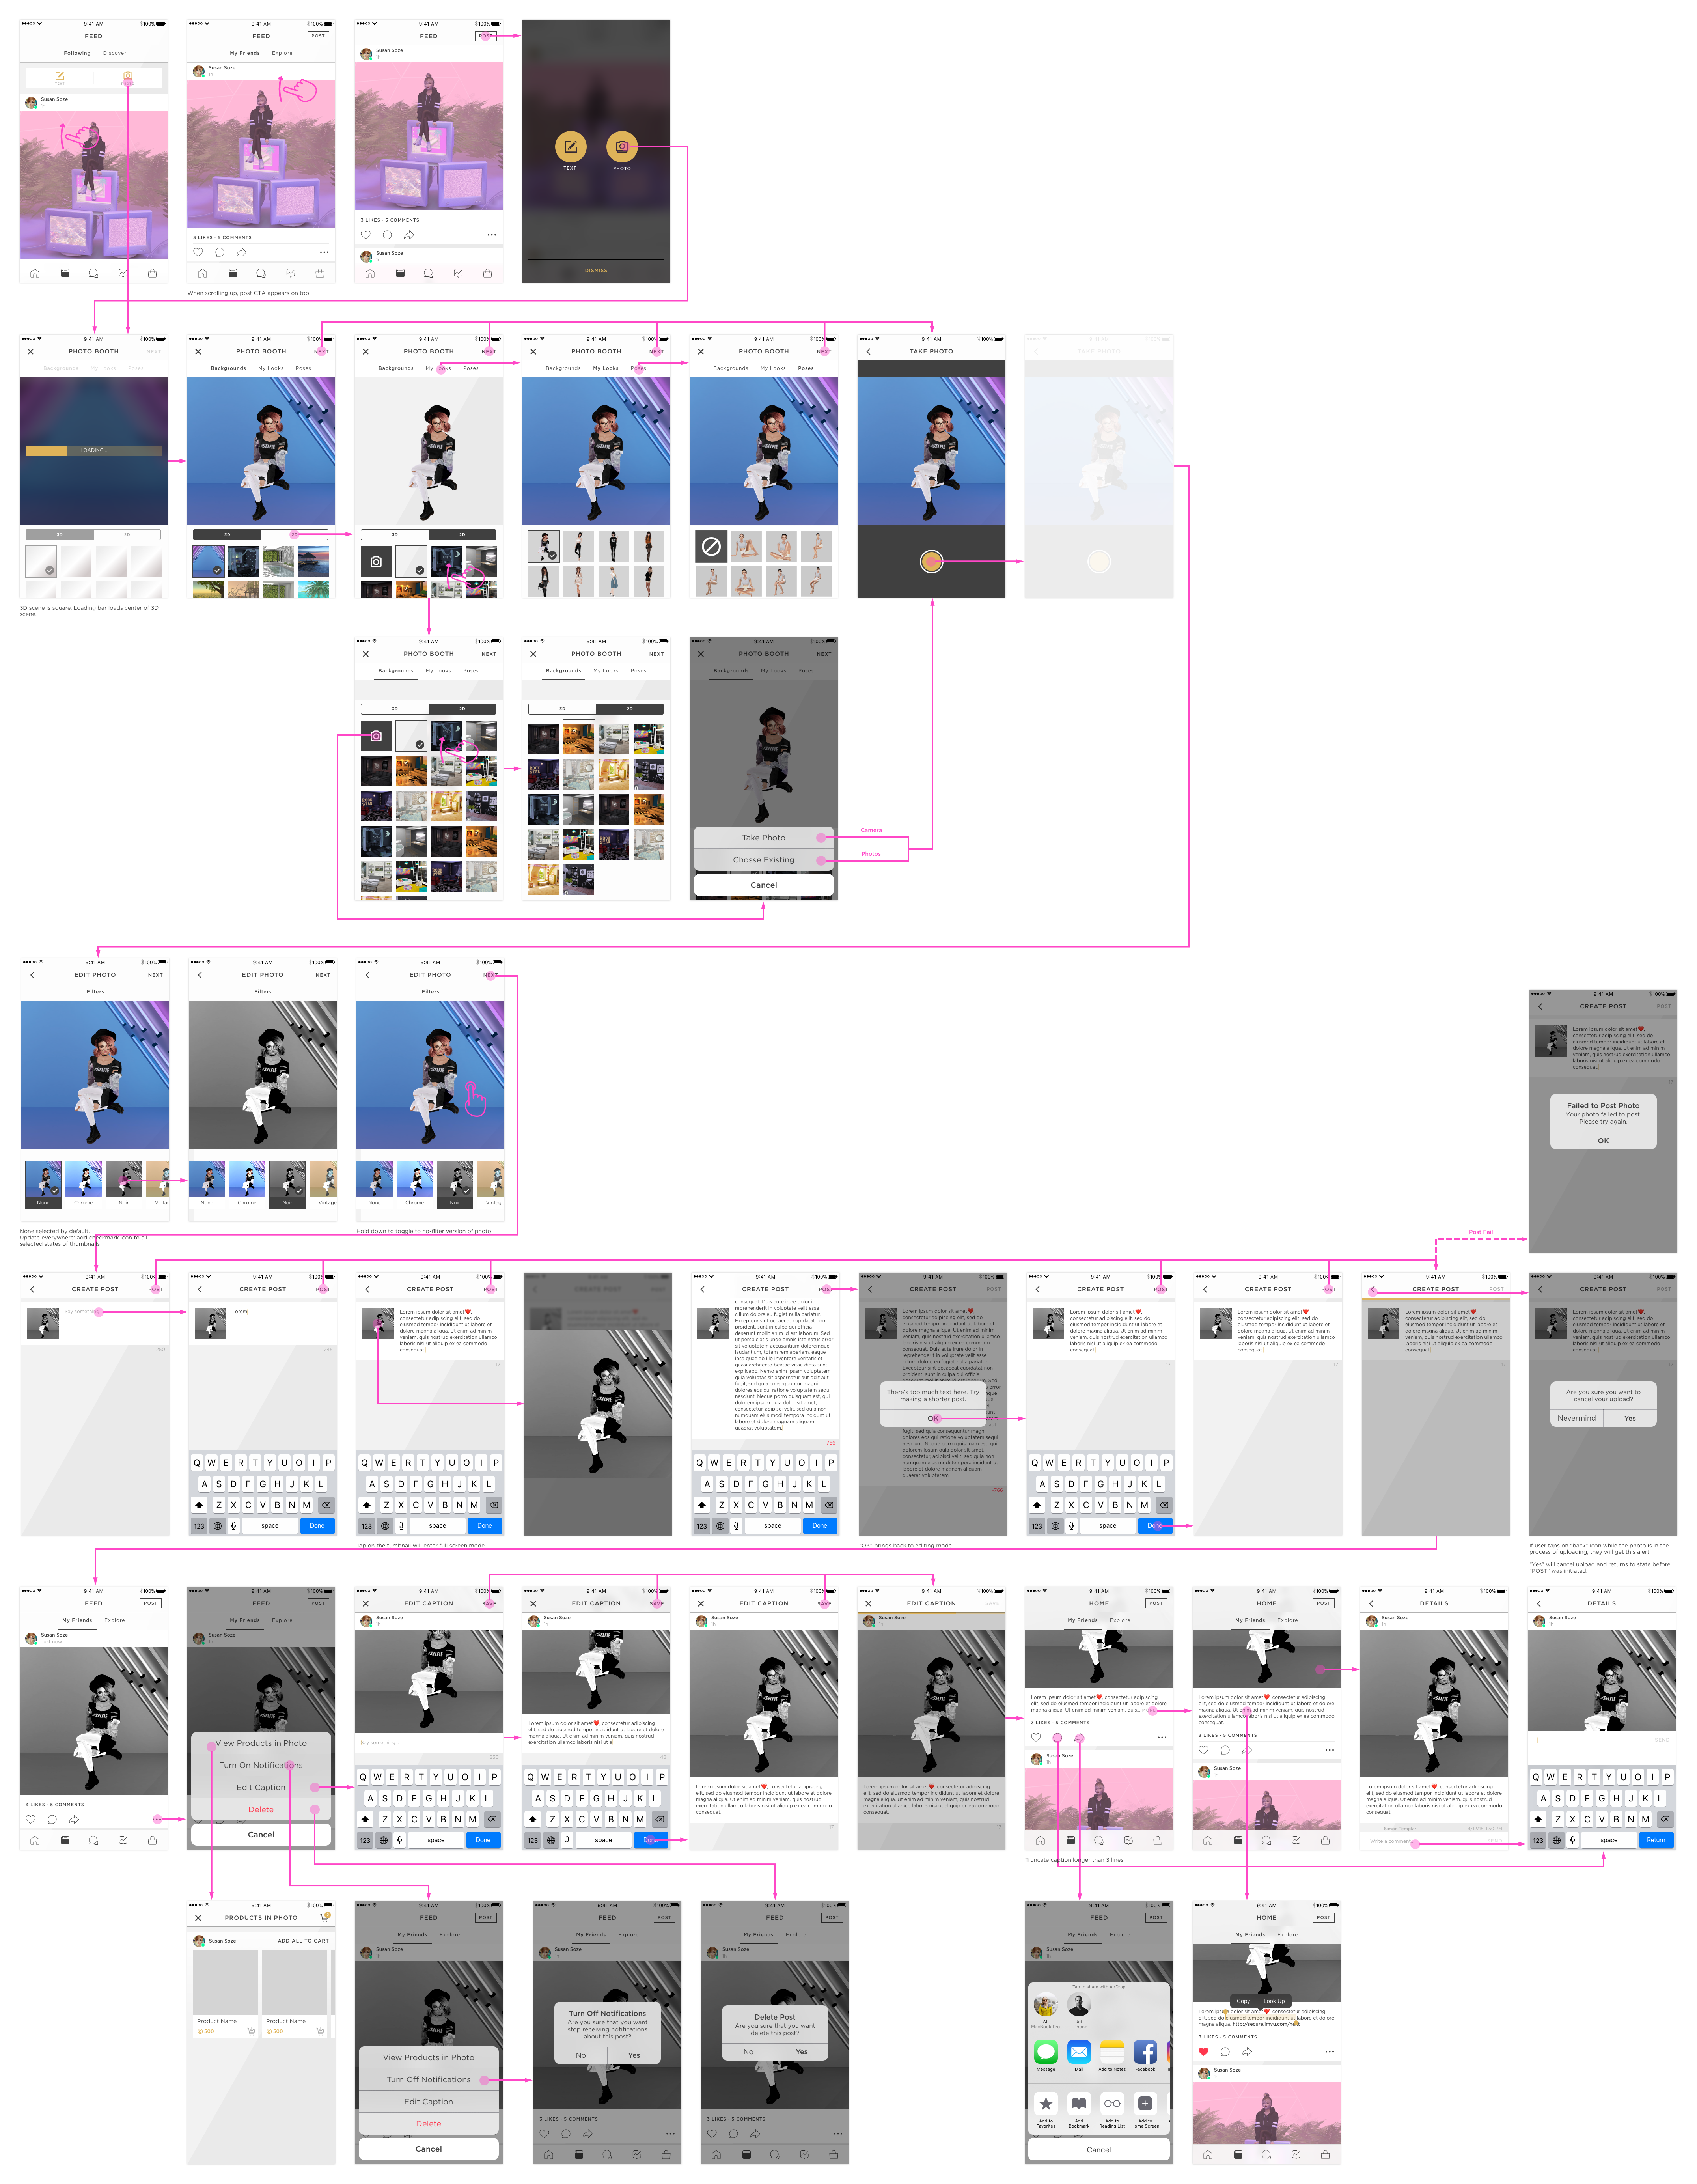
Basic Flow

Grid Layout

User story
 Feed Screen
This is the primary entry point into the 3D Photo Booth experience
User – Susan Soze – launches her iOS app and sees two buttons at the top of the feed: Photo and Text.
She taps on Photo and is taken to the next step.
 Photo
Booth/Backgrounds/3D
Photo
Booth/Backgrounds/3DThe next step of the flow is Photo Booth, and includes 3 views: Backgrounds (shown here), My Looks (described later) and Poses, is where Susan can change everything that will eventually be captured in the 2D photo (which can then be further tweaked with filters.)
 Photo Booth/Backgrounds/2D
Susan can choose from the list or use her own image
(take photo or choose existing) as 2D background.
 Photo Booth/My Looks
This step is called My Looks. Susan can select from her Saved Looks here.

Photo Booth/Poses
This step is called Poses. Susan can select different
poses here.

Take Photo
Now that Susan has composed her view, adjusted her camera, and selected an outfit, she is on the Take Photo view, and can take a photo of the view.
 Edit Photo / Filters
Susan has taken a 2d version of her photo, and now can do some additional post-processing of her photo using filters.
 Create Post
After Susan edited the photo, she can choose to enter some caption to describe the photo.
 Feed, After Posting
Susan has posted the photo from the previous step, and her photo is now posted to the feed.

Final Look
Photo Booth Trigger
Photo Booth Interaction
Taking/Editing Photo
Photo Booth Trigger
Photo Booth Interaction
Taking/Editing Photo
Rollout
Rollout controlled using A/B testing that allows to manage multi-variate branches, adjust rollout percentages, and turn specific branches on/off for maximum control of risk.
To maximize learning about the features themselves – rather than getting a lot of already expected device performance feedback – the earliest rollout is targeted at high-performance devices. We're targeting devices, and not specific users accounts, to better control the feedback and resulting UX on shared devices, or for devices where a user has multiple IMVU logins (alts, for example.)The initial rollout will target this segment of devices:
• Device has an A7 chip
• Device is not an iPad
This segment will be split into a 50/50 test:
• 50% get the current/existing 2D photo experience (Control Branch)
• 50% get the new 3D Photo Booth experience (Experiment Branch)
Result
Good reviews from App Store and higher retention rate.
